
Part one: MODELING
Hey there, 40k fans!
Though the great majority of my grey matter is dedicated to the more competitive aspect of 40k, I’d be remiss if I didn’t focus on the hobby elements from time to time. After all, conversion is a great way to get access to competitive models without breaking the bank. Painting and basing is a great way to increase your overall score at an event. Most importantly however, practice makes perfect and how can you practice without having terrain on your table? So, with that in mind, we’ll look at some very inexpensive methods to help filling out your table.
While pre-made terrain exists in plastic kits, expensive resin kits or the cheaper MDF style, we’ll look at using some recycled hobby materials. While some may wish to spend the money rather than the time to create terrain, this should only take up two of your afternoons to make a few square feet worth of terrain. If you’ve been in the hobby for a while, you should have everything you need to build similar pieces as I made for this article. If you’re newer to the hobby, you may be able to come across the material fairly cheap. Check some of the buy/sell groups for 40k; you’ll likely have no trouble getting your hands on what is otherwise considered to be leftovers to many players.
MATERIALS
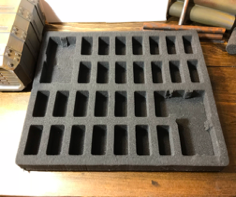
The materials we’ll be working with are foam. More specifically, the foam used from 40k carry cases. One single tray should provide you with enough foam to make a half dozen terrain features. Additionally, I rounded up some foam packing shaped in cylinders from an old case.

Next, I found some old sprues of movement tray “curbs”. Plastic curbs that clip onto the perimeter of the old customizable movement trays from Warhammer Fantasy. I immediately noticed that they looked like girders. You could also use actual sprue for the same role; recycling your 10 metric tones of sprue you have lying in your closet in the process!
If you have access to old movement trays, they make an excellent base for the ruins as the 25mm slots intended for the models also look exactly like floor tiles. If you don’t have such trays, you can simply use plasticard for the base of your ruins, or equivalent products. Basically, just something to stand the ruin walls up on that is square or rectangular in shape. Beyond that, you’ll need an adhesive. For this project I used a glossy finish Modge Podge, which I highly recommend. It dries clear, is easy to work with and makes a fantastic bond!
Lastly, you’ll want to snag some materials for painting. Since we’re making ruins, grey is a very important colour. No need to burn through expensive model paints for this! Your local big multi-billion-dollar-conglomerate-department-store should have a crafts section where you can pick up some extremely cheap paint in large quantities. Grey and white are a must. A black spray primer is highly recommended; it will do a lot of the shade work for you. Finally, pick up a variety pack of brushes. With how cheap they are, they are perfect for painting large quantities of terrain and or being damaged through spreading our adhesive.
CONSTRUCTION
Now, the next step is the construction phase. Take all the bases for your ruins and get them to your desired shape or size. If you want to go a modular route like I did, make your bases a little smaller. A few inches square will suffice.
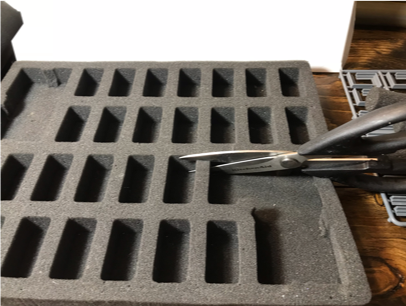
Next, take your foam tray and start to cut the segments away; the foam that acted as dividers for each little model sized compartment. Feel free to vary the shape and length as you see fit. These segments will be our concrete walls. Notice their perfectly uniformed lengths and widths; ideal for constructing walls. Additionally the porous nature of foam will give the walls a very raw, concrete look. Feel free to add rips too. The ripped foam looks uncannily like roughly hewn rock; you can also use foam chunks to litter the bases of your ruins. Lastly, be careful not to remove the foam layer that makes up the outer most perimeter of the tray. This can be used to make one large 12”x10” ruin. You can also leave a few segments of foam intact on the inside of the tray to give the illusion of walls.

Next, take your foam segments and arrange them on the bases you have selected. Place them on the edges of the bases to form the walls. It’s good to visualize your layout before you start gluing things. If you’re going for a modular route, arrange the walls in either a straight line from one end of the base to the other, or in an “L” shaped pattern to represent a corner. If your bases are larger and you’re going to make single pieces, arrange the walls so that the base has three of it’s four edges enclosed.
Once you’ve planned your layout, begin by brushing the bottoms of your wall segments with Modge Podge. It needn’t be watered down entirely, but be careful to dip your brush in water every third or fourth time you dip into the Modge Podge. Once those bottoms have all cured, you now have a stiff surface of the foam that can adhere to your base.

Using the Modge Podge once more, glue the wall segments in place. If you’re looking to create walls with enough height to block line of sight to infantry, your walls will need to be two segments high. To achieve this, simply add a layer of Modge Podge to the parts of the segments that will later be glued together. Remember, you need that cured surface on the foam to glue it to other surfaces.
Next, add some character to the bases while you wait for the walls to dry to the base. A pile of girders in the corner ready for construction, sand/gravel for texture, more foam chunks for rubble or even some model scenery. I’d highly recommend adding elements that will be perceived as metal. Pipes, maybe scraps from a vehicle kit or the aforementioned girders as they’re quite simple and dynamic. The purpose of the metal elements will be made clear in the second part of this article which will cover painting.
While you’re waiting for your foam to cure, you can add the girders. Carefully cut slits into the tops of the foam and use a pen or similar object to spear into the foam. This will provide the space to insert the girder. Literally using discarded sprues will work if you don’t have the movement tray “curbs”. The curbs simply have the added benefit of extra detail to catch washes, but any similar, rigid shape will do.
Take the girder and dip it into your Modge Podge to a depth equal to the puncture you made in your foam and slide it into place. Arrange as many as you want in whatever positions you want with differing lengths. Ensure that they are evenly spaced, but otherwise at different heights. The uniform spacing makes it look more probable while differing heights make it look dynamic.

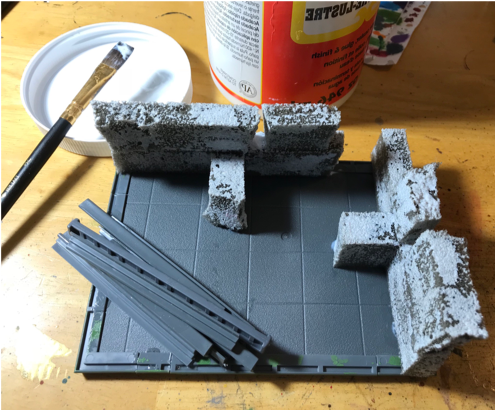
After a few hours your foam should be nice and stable. Using your disposable brushes, it’s time to paint the foam in your adhesive! Again, I’ve used Modge Podge for this step. I love Modge Podge. It’s really fun to say, too… Uh, anyway, as you spread the adhesive over the foam, you’ll notice that you don’t get complete coverage, and that’s okay! Most of the pores will harden regardless of being filled or not. In other places you’ll note that the Modge Podge does fill each pore to the point of creating an almost completely smooth surface. This is also good! You’ll create a very uneven surface comprised of many different textures that make it appear rich with
detail. Coat every part of the foam that is going to be painted. Just like trying to glue foam onto a surface, the foam needs to be coated in order to catch paint.

In this example, I’ve purposely layered the Modge Podge thicker on the left side. This will create the illusion of a smooth top, painted layer while the porous surfaces will be the degraded concrete that has had the paint chipped away.
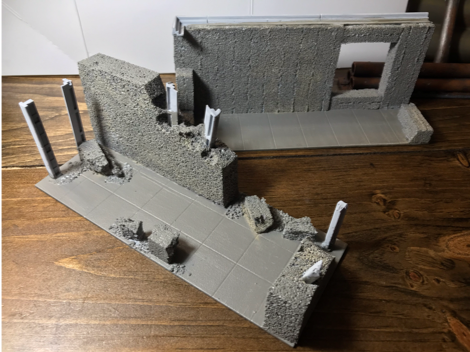
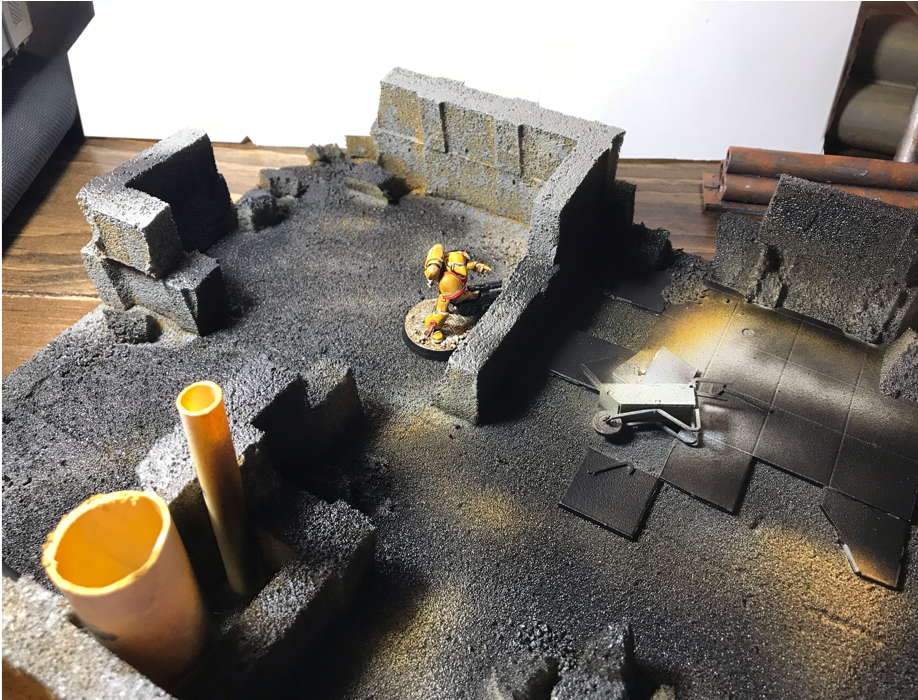
Finally, you should have your foam tray that you started with, it’s outer edges still intact. As you were cutting segments away for your other walls, did you notice how that foam tray was starting to look like a ruin itself, interior walls and all? I noticed it too, hence why I decided to experiment with it. Using the same processes as I detailed above, I added some more height to the outer walls and a couple pieces to add character. ABS plastic tubing for pipes, gravel and even some leftover tiles from my movement trays. Here’s some pictures of the ruin as it was getting ready for the painting stages:
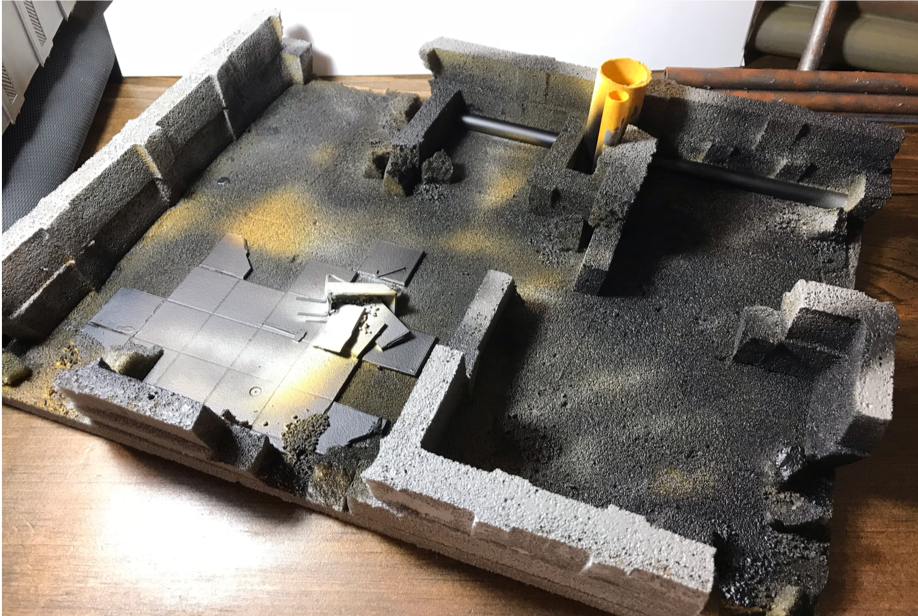
Well, that should keep you busy for an afternoon! Though you could probably prime in the same day, it’s probably best to ensure everything cures properly. So, everything all told, you should have a nice selection of based foam chunks in the rough shape of ruins – carefully coated in our glorious saviour, Modge Podge. Bonus points if you also destroyed your lounge room in the process; I’d hate to be the only one sleeping on the couch tonight!
Check back for the next part where we’ll delve into the painting aspect of this little experiment and see if we can’t breathe life into our little foam city! Until then folks, happy wargagaming!
